How To Pluck The Hairline Of A Wig?
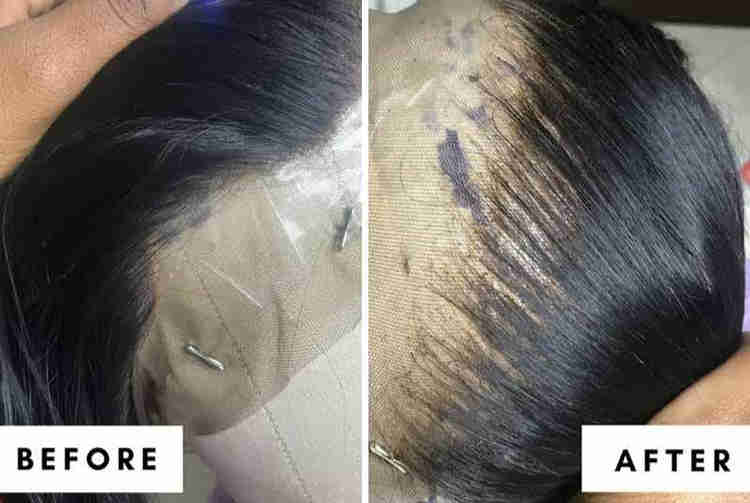
If you are new to the world of wigs, I’m going to let you in on a little secret: you need to pluck, and bleach the knots, hon. Plucking your lace front wig will ensure you have a natural hairline instead of the super straight; I’m obviously a fake hairline.
But how? While you might think you have to have a year of cosmetology school under your belt to pluck a hairline, it’s actually a lot easier than you might think. Even someone brand new to wig-wearing can pluck their hairline, honey.
Ready to make your lace front wig look like the real deal? Then keep reading. I’m sharing the easiest and best way to pluck a lace front wig. Get ready to slay all day.

Step 1: Get Your Tools Ready
Tools? No, I’m not talking about a hammer and a chainsaw. It’s not that serious, queen. There are only a few pieces of equipment you will need to be successful:
Your desired lace front wig
Wig stand
Pins
Comb
Tweezers
Luckily, these are things that you likely have in your home already. The only thing you might need to buy is a wig stand. No, it’s not technically a must, but it will make your job 100 times easier and give you far better results than without.
(Psst.. Amazon has really affordable wig stands)
Step 2: Decide Whether to Pluck Wet or Dry Hair
Does it matter? No, not really. It’s more of a personal preference.
Working with wet hair is a bit easier because the strands are more easily maneuvered. However, dry hair will provide you a more accurate depiction of what the hair will look like. With wet hair, you have to wait till it dries to see the final product.
Step 3: Put the Lace Front Wig on the Wig Stand
When placing your lace front wig on the wig stand, make sure that it is securely fitted onto the stand. To provide added security, consider adding pins to hold it down.
The addition of pins will ensure that the wig doesn’t slip and slide while you’re plucking, which could lead to a disfigured hairline. Place a pin on the bottom back-of-the-head lace on each end and pins on each temple-side of the lace. For extra security, place a pin on the front of the lace (avoid placing pin on hairline).
Step 4: Comb the Lace Front Wig
The next step is to comb through the lace front wig entirely. You want to make sure that the wig is void of any type of knots or tangles which could hinder your plucking abilities.
That said, pay extra close attention to the hairs around the hairline. They should be 100% smooth and tangle-free.
Step 5: Start Plucking Your Wig
Now, it’s time for the moment you’ve been waiting for: plucking your wig.
Ladies, if this is your first time, I’m going to tell you this much – go as slow as you want. Take your time. A rushed hairline will appear rushed and sloppy, and that’s something you want to avoid.
Here are a few key things to remember when you start plucking:
Pluck the strands of hair away from the face for a more natural appearance.
Pluck every other strand, so it is spaced out without bald spots.
Start above the ear and make your way to the middle of the head.
Go slow.
Don’t over pluck. While you can pluck too little and use your tweezers for more plucking magic, you can’t replace plucked-out strands. That said, make sure you are lenient with the plucking.
Make sure that you’re plucking the actual strands of hair and not the lace.
When finished, brush out the hair to remove any loosened strands.
Step 6: Repeat Step Five with More Layers
Don’t stop at the front of your hairline. Just like your natural mane, hairs around the hairline go back further than a single layer. That said, you need to pluck several layers of the hairline for a more organic finish.
The best way to accomplish this is by parting the hairline into small sections. Take a bit of the hair and separate it from the rest of the bulk. Pluck the hairline in the same fashion as you did before: slowly and from ear to ear.
Continue this process until you have plucked at least three or four layers of hair.
Step 7: Finish the Look
Now that you have plucked several layers of the hairline successfully, it’s time to polish it up a bit. Comb the lace front wig thoroughly and inspect the hairline. Does it appear natural? Are you happy with the final result?
If you think the hair could benefit from a bit more plucking, now is the time to do it. Pinpoint which areas might need a few more plucked strands. Remember not to overpluck during this process, either.
Tip: Pulling the hair back into a ponytail will provide you with a better visual representation of what the hairline looks like.
Are you more of a visual person? Then check out this easy video that shows you how to pluck your lace front properly:
Credit: Youtuber - Tara Ajhanae
More Blogs:
Shop With Heavenly Hair by Nicole for Top-Notch Virgin Hair Wigs, Bundles, Closure, Frontal
Sign-Up For Our Email Alerts about Free Hair Giveaways, Exclusive Offers, & New Products
Stay Connected With Us!


Comments
Post a Comment